Table of Contents
Introduction:
Finding a snack that satisfies both criteria can be challenging in a world where healthy eating and convenience often clash. For fans of Chomp’s beef sticks, these protein-packed snacks are the perfect solution, delivering flavor and nourishment in a convenient package. Ideal for refueling after a workout, snacking during busy days, or simply indulging a craving, beef sticks are a beloved go-to. But what if you could recreate those delicious Chomps-style beef sticks in your kitchen? You can enjoy complete control over the ingredients, flavors, and nutritional content with some effort.
In this comprehensive guide, we’ll take you through making homemade beef sticks—from selecting the right ingredients to mastering the cooking technique. By the end of this journey, you’ll be equipped to whip up your delicious, healthy beef sticks that rival store-bought versions and cater to your unique tastes and dietary preferences. Whether you’re a seasoned home cook or a kitchen novice, this recipe empowers you to create a nutritious snack for yourself and your loved ones.
The Benefits of Making Your Chomps-Style Beef Sticks
While the convenience of purchasing pre-made beef sticks is undeniable, there are several compelling reasons to roll up your sleeves and make your own:
1. Control Over Ingredients
When crafting your beef sticks, you gain complete control over every component that goes into them. You can opt for high-quality, grass-fed beef and avoid the artificial additives, preservatives, and fillers often found in commercial snacks. This transparency allows you to align beef sticks with your health goals and dietary preferences.
2. Customization to Suit Your Taste
Since taste is a personal experience, everyone has different preferences for different flavor characteristics. Making beef sticks at home allows you to personalize the seasonings according to your liking. Whether you enjoy extra heat, prefer a sweetness, or want to experiment with unique spices, the choice is entirely yours.
3. Cost Efficiency
High-quality snack sticks are expensive. By making your own, you can produce a larger quantity at a fraction of the cost. This means you can indulge in a nutritious snack without breaking the bank.
4. Dietary Considerations
If you adhere to specific dietary restrictions—keto, paleo, or Whole30—you can tailor your beef sticks to meet your nutritional needs. This ensures you enjoy a satisfying snack that aligns perfectly with your lifestyle.
Understanding Chomps-Style Beef Sticks
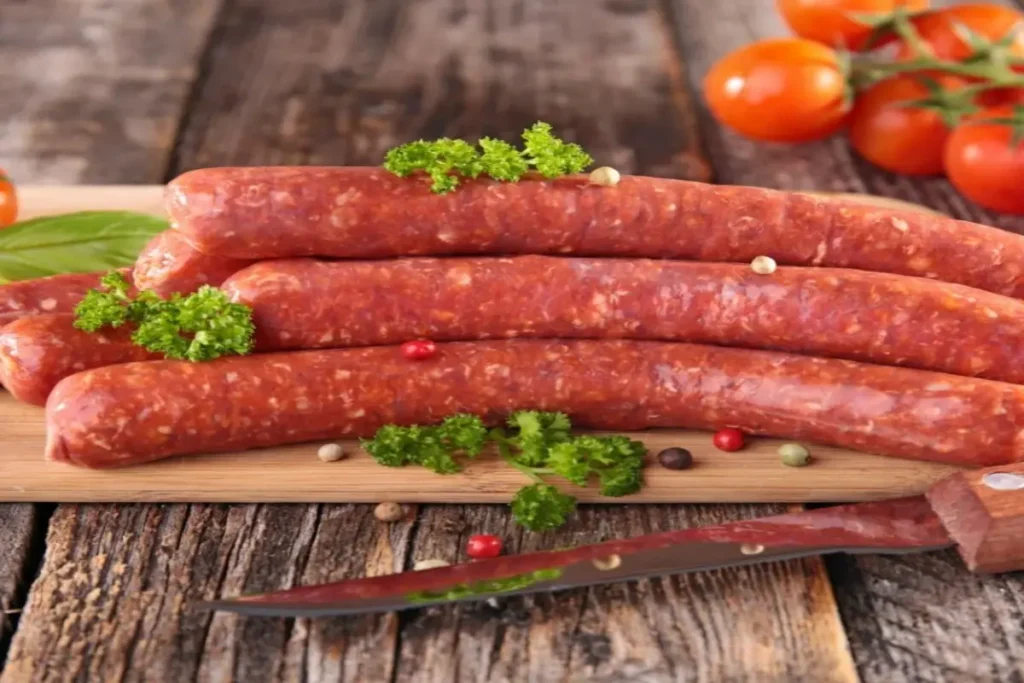
Chomp’s beef sticks are famous for their savory taste and wholesome ingredients. They are high in protein and free from unnecessary additives, making them ideal for health-conscious snackers. To recreate their flavor and texture at home, you must pay close attention to the ingredients and preparation methods.
Critical Ingredients for Your Homemade Beef Sticks
Now that you understand the benefits of making beef sticks let’s explore the essential ingredients that will help you achieve that signature Chomp flavor.
1. Grass-Fed Ground Beef
At the heart of every excellent beef stick is the quality of the meat. Opt for 100% grass-fed and grass-finished beef to capture that rich, natural flavor. Grass-fed meat is more flavorful and contains higher omega-3 fatty acids, making it healthier than conventionally raised beef.
2. Sea Salt
Salt is crucial for seasoning and preserving beef sticks. Choose sea salt as a healthier alternative to regular table salt, as it offers trace minerals and is less processed. Proper seasoning enhances the overall flavor and helps create that satisfying umami taste.
3. Garlic Powder
Garlic powder adds depth to the flavor profile of your beef sticks without overwhelming the meat. Its aromatic quality complements the beef beautifully, making it a staple ingredient in this recipe.
4. Smoked Paprika
Smoked Paprika is a must to achieve that characteristic smoky, savory taste. You can adjust the quantity based on your preference for smokiness, allowing for a customizable flavor experience.
5. Black Pepper and Red Pepper Flakes
These two spices combine to introduce a subtle heat to your beef sticks. The black pepper adds a classic peppery flavor, while red pepper flakes provide a kick that many Chomps fans adore.
6. Onion Powder
Another layer of seasoning that rounds out the flavor, onion powder brings a savory note that enhances the overall taste of your beef sticks. It pairs well with garlic powder, creating a well-balanced flavor profile.
7. Coriander or Cumin
For added depth, consider incorporating a hint of coriander or cumin. These spices add a slightly earthy and warm note, elevating the flavor complexity of your beef sticks.
8. Natural Casing (Optional)
For an authentic beef stick experience, you can use natural collagen casings, readily available online or in specialty stores. Although optional, casings contribute to commercial beef sticks’ traditional texture and appearance.
Step-by-Step Recipe for Homemade Beef Sticks
Ready to make your beef sticks? Follow this detailed recipe to create your delicious snack!
Ingredients Needed
- 2 pounds of grass-fed ground beef (preferably with an 80/20 fat ratio)
- 2 teaspoons sea salt
- One teaspoon of garlic powder
- Two teaspoons of smoked Paprika
- One teaspoon of black pepper
- ½ teaspoon red pepper flakes (adjust to taste)
- 1 teaspoon onion powder
- 1 teaspoon coriander or cumin (optional)
- Natural collagen casings (optional)
Equipment Needed
- Mixing bowl
- Meat grinder (or food processor)
- Sausage stuffer (if using casings)
- Baking sheet or dehydrator
- Parchment paper (if not using casings)
Step 1: Prepare the Meat Mixture
- Combine the Ingredients: Put the grass-fed ground beef and sea salt in a mixing basin. Add red pepper flakes, black pepper, and smoked Paprika. Add the onion powder, garlic powder, and cumin or coriander of your choosing. Thoroughly mix until all the ingredients are uniformly distributed.
- Test the Flavor: To ensure the flavor is to your liking, cook a small portion of the mixture in a skillet. Taste and adjust the seasonings as needed. This step is essential to getting the ideal flavor balance.
Step 2: Stuffing the Beef Sticks
- Using Casings: If you use natural casings, after giving them a thorough rinse, soak them for around half an hour in warm water. This softens the casings, making them easier to work with. Attach the sausage stuffer’s casing and carefully fill it with the beef mixture. Be sure not to overstuff, as the meat needs room to expand during cooking. Twist the sausages into desired lengths and tie off the ends.
- Without Casings: If you prefer to skip the casings, form the beef mixture into logs or patties on a parchment-lined baking sheet. These shapes can still be flavorful and satisfying.
Step 3: Cooking and Drying the Beef Sticks
The cooking method will depend on whether you use a dehydrator or an oven. Both methods will result in delicious beef sticks, so choose the one that works best for you.
Dehydrator Method
- Set the Temperature: Preheat your dehydrator to 160°F (71°C). This low temperature is essential for drying the beef without cooking it too quickly.
- Arrange the Beef Sticks: Place the stuffed beef sticks on the dehydrator trays, avoiding contact with one another to ensure adequate air circulation.
- Drying Time: Dehydrate the beef sticks for about 6-8 hours. The exact time may vary based on the thickness of your sticks and the specific dehydrator model you’re using. Check periodically until they reach your desired texture—firm but slightly pliable.
Oven Method
- Preheat the Oven: If using an oven, preheat it to 170°F (77°C).
- Arrange the Beef Sticks: Put the beef sticks on a parchment-paper-lined baking sheet. If you’re using casings, you should let moisture out and slightly open the oven door, ensuring a better drying process.
- Baking Time: Bake the beef sticks for approximately 6-8 hours. Again, the timing will vary based on thickness and desired doneness. Regularly check on the sticks to prevent overcooking.
Step 4: Cooling and Storing
Once the beef sticks are cooked, remove them from the oven or dehydrator and let them cool completely at room temperature. After cooling, could you keep them in a tightly sealed container or vacuum-seal them for optimal freshness? Properly stored, homemade beef sticks can last in the refrigerator for up to three weeks or in the freezer for several months.
Pro Tips for Perfect Beef Sticks
To ensure your beef sticks turn out just right, consider the following expert tips:
1. Fat Content Matters
Aim for ground beef with an 80/20 fat ratio for the best texture and flavor. This balance of lean meat to fat ensures that your beef sticks remain juicy and flavorful. Using too lean a cut can result in dry sticks, while too much fat can lead to greasy results.
2. Experiment with Flavors
Feel free to experiment with different spices and seasonings. Adding fennel seeds, mustard powder, or apple cider vinegar can introduce exciting flavor variations. Your kitchen is your laboratory—don’t hesitate to try new combinations that excite your palate.
3. Avoid Overcooking
Whether you’re using a dehydrator or an oven, the key to great beef sticks is slow drying at a low temperature. This method prevents the meat from becoming rigid or overly dry. Be patient; the longer the drying time, the better the final product.
4. Mind the Casings
If you use collagen casings, soaking them in warm water before stuffing is essential. This step helps prevent cracking while stuffing, resulting in a more appealing texture. Additionally, ensure the casings are well-sealed at both ends to avoid leakage during cooking.
5. Cooling and Testing
After drying, allow your beef sticks to cool completely before storing. This helps them maintain their texture and ensures they are thoroughly dried out. Test a small piece to check for desired flavor and texture before storing the entire batch.
6. Label and Date Your Sticks
Label and date your storage containers if you’re making multiple batches or trying different flavors. This will help you track which flavors you prefer and ensure you consume them while they’re freshest.
Creative Variations to Try
Once you’ve mastered the basic recipe, you can explore various creative variations to keep your homemade beef sticks exciting:
1. Spicy Jalapeño Beef Sticks
Add finely chopped jalapeños or a few teaspoons of jalapeño powder to the mix for a spicy kick. Adapt the quantity to your personal choice and heat tolerance.
2. BBQ Beef Sticks
For a smokey flavor, add in a couple of teaspoons of your preferred barbecue sauce sweet flavor. You can also sprinkle some brown sugar to enhance the sweetness and complement the BBQ essence.
3. Herb-Infused Beef Sticks
For an aromatic twist, experiment with fresh or dried herbs like rosemary, thyme, or oregano. Fresh herbs add a vibrant flavor and aroma to your beef sticks, while dried herbs offer a more concentrated flavor.
4. Teriyaki Beef Sticks
Add soy sauce, ginger powder, and sesame seeds to give the meat mixture a distinctive twist. This Asian-inspired version will give your sticks a sweet and savory flavor profile.
5. Cheesy Beef Sticks
Mix grated cheese—like cheddar or pepper jack—into your beef mixture. This addition will create a creamy texture and delightful cheesy flavor, making each bite more indulgent.
Serving Suggestions
Homemade beef sticks are incredibly versatile and can be enjoyed in various ways:
1. As a Snack
Enjoy them straight out of the fridge as a quick, satisfying snack to keep your energy levels up throughout the day. They pair excellently with cheese or your favorite mustard for a flavor boost.
2. For Meal Prep
Beef sticks make for an excellent addition to meal prep. Pair them with fresh vegetables, nuts, or fruit for a balanced and nutritious lunch or snack.
3. On a Charcuterie Board
Add your beef sticks to a charcuterie board paired with a variety of cheeses, olives, cured meats, nuts, and crackers. They will bring a hearty element to your platter and complement the other flavors beautifully.
4. As a Topping
Chop up your beef sticks and use them as a flavorful topping for salads, grain bowls, or pizza. Their bold flavor can elevate a simple dish to a whole new level.
Conclusion: A Fun and Delicious DIY Project
Making your Chomps-style beef sticks at home is a rewarding culinary project and a way to indulge in a delicious, healthy snack tailored to your tastes. Following the instructions in this book will provide you with the abilities and information required to make tasty, wholesome, and filling beef sticks.
When you start your culinary adventure, keep in mind that there are a gazillion alternatives. Feel free to experiment with different spices, seasonings, and even meat types to develop a unique flavor profile that reflects your preferences. Plus, the satisfaction of crafting a homemade snack that rivals store-bought options is a joy all its own.
So gather your ingredients, channel your inner chef, and dive into the world of homemade beef sticks. You’ll improve your abilities with each batch and wow loved ones with your mouthwatering dishes. Happy snacking!


